Looking for a unique way to add some greenery to your outdoor space? Why not try creating an outdoor moss wall! This fun DIY project is relatively easy to do and is a great way to bring some life to your backyard, patio, or deck.
This project is perfect for anyone even if your are a beginner – all you need is some patience and a little bit of know-how. In this blog post, we will walk you through the seven steps necessary to make your very own moss wall. Let’s get started!
What Is A Outdoor Moss Wall?
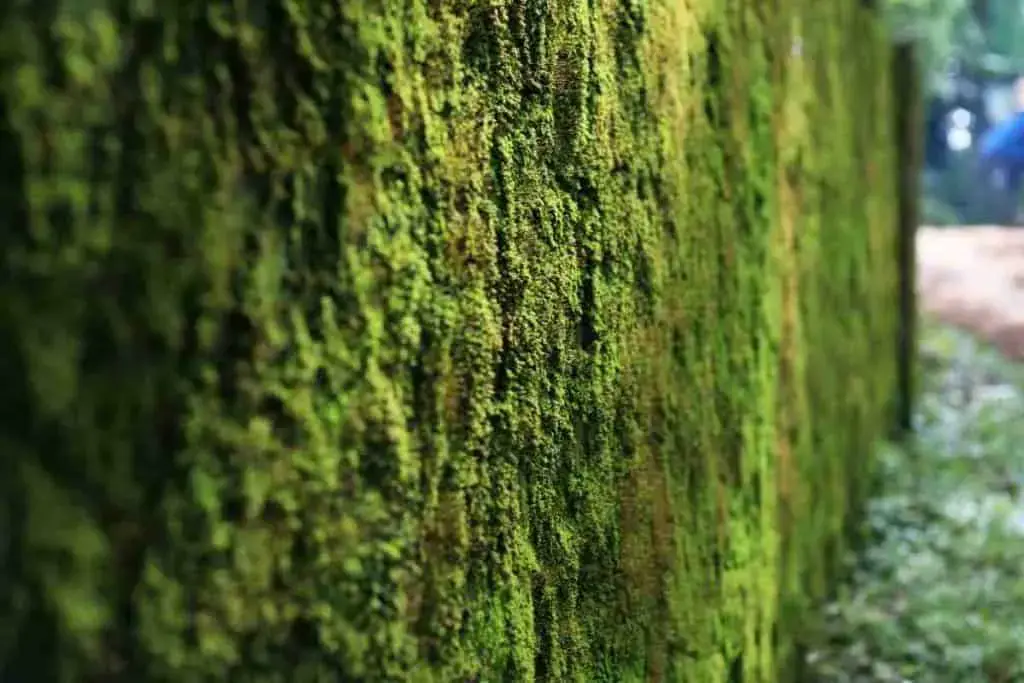
Outdoor moss walls are a new and trendy way to improve the look of your outdoor space. If you’re not familiar with them, moss walls are simply a wall covered in moss and are made by installing a framework and then using mosses and other accessories to fill in the spaces.
These outdoor moss walls are very similar to the ones you have indoors, but instead of using preserved moss, live moss is used.
They can be hung on a porch, patio, or fence, and not only will they look stunning, but they will add some extra greenery and life to your outdoor space.
Types Of Moss Used For Outdoor Moss Walls
There are many different types of moss that can be used for an outdoor moss wall, and each one with its own unique characteristics. The most common types include:
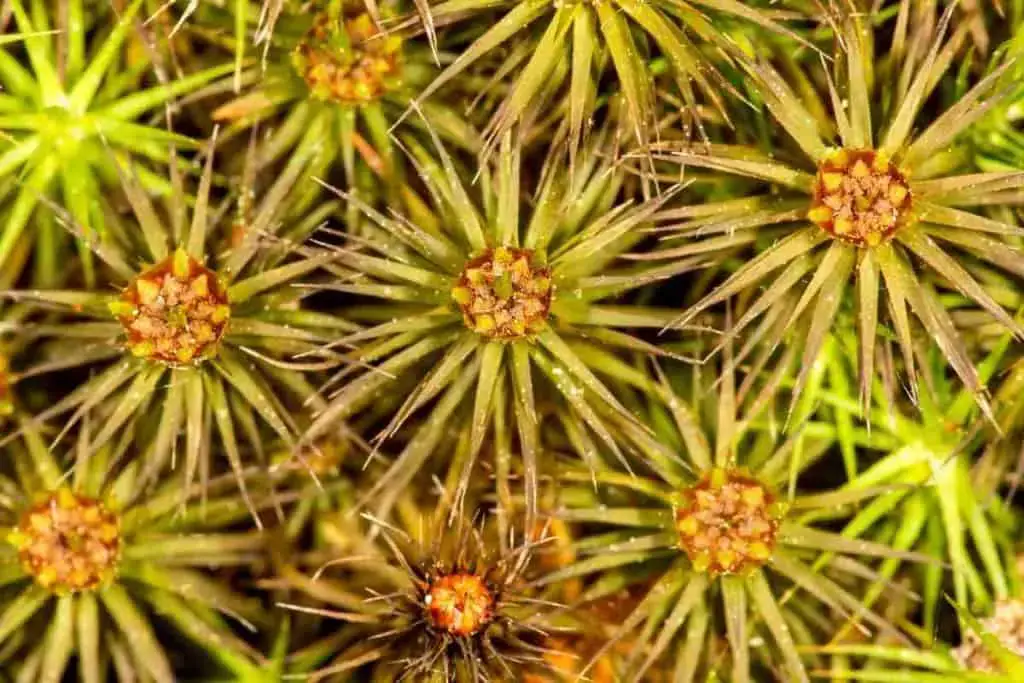
Hair Cap Moss
- Hair cap moss (Polytrichum) is one of the most popular types of moss used for moss walls because it’s very easy to work with. The stiff stems are brown in color with small green pointed leaves that grow 4–20 cm tall including the tips.
- The tips of the moss (calyptra) “where the spores are located” has a star-shaped appearance “similar to a flower” making it very appealing to the eye.
Broom Forkmoss
- Broom fork moss (Dicranum Scoparium) is another popular type of moss that is used for walls. This moss forms shiny “dark green tufts” that grow 3 to 4 inches thick and have spearhead-shaped.
- However, depending on the mosses’ healthy it can vary in color, from light to dark green, or even yellow, and can survive in damp or dry conditions.

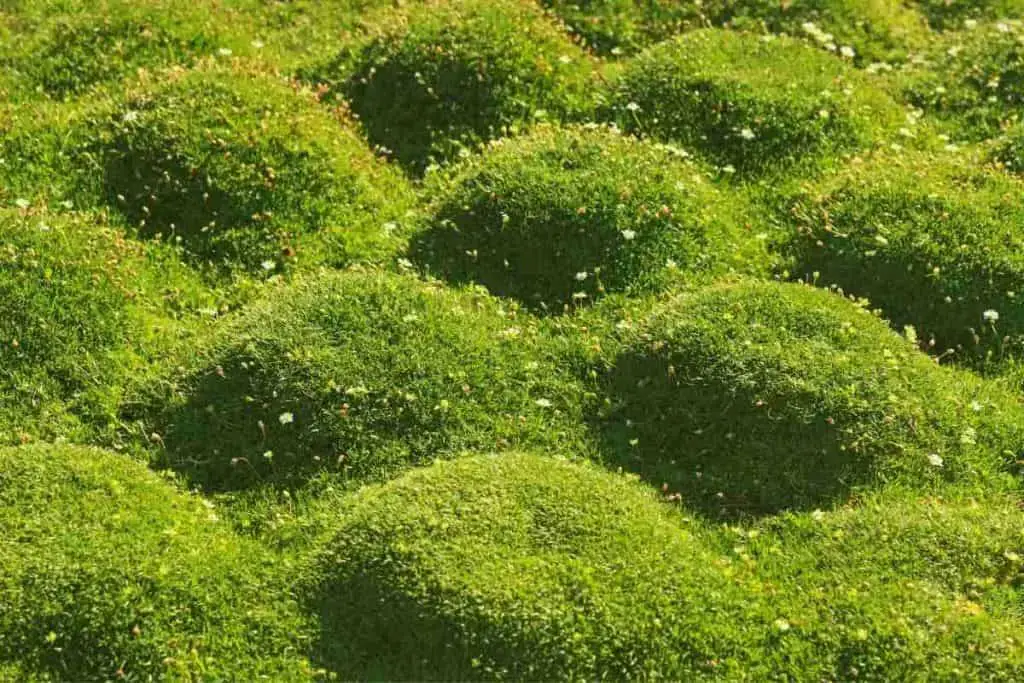
Pin Cushion Moss
- Pin Cushion Moss or known as (Leucobryum Moss) is a very compacted type of moss that is bright green, and can be found growing on hard surfaces like rocks.
- Of course, this is an (acrocarpous moss) which means it doesn’t branch out like “Pleurocarpous moss” and grows much slower too. However, it’s very easy to manage and sculpt!
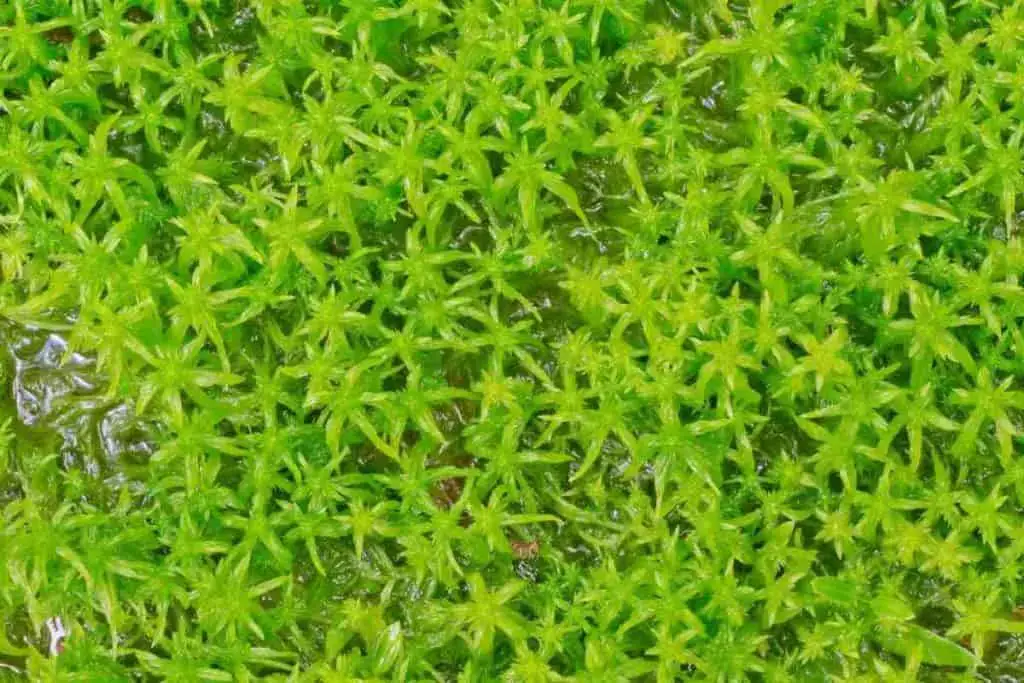
Sphagnum Palustre
- Prairie Sphagnum moss or (Sphagnum Cymbifolium) moss is a type of peat moss that can grow up to 25 cm in height. The leaves are light green with brown stems.
- The moss is usually formed in clusters and has pigmented heads that produce spores. The heads can hold a lot of water and like “hair cap moss” is very appealing to the eye!
Benefits Of Having An Outdoor Moss Wall
Moss walls are the latest trend for indoor and outdoor home decoration, and for good reason. Not only do they look great, but they also offer a wide range of benefits.
Natural Sound Absorbers
One of the most surprising benefits of moss walls is that they can act as natural sound absorbers. This is because moss is able to absorb and muffle noise, making it perfect if you live in a busy neighborhood.
Of course, this won’t completely remove the noise but, will definitely help reduce some of it.
Helps Improve Air Quality
Another great benefit of moss walls is that they can help improve the quality of air around them. Moss is known to absorb harmful toxins and pollutants from the air, making it a great way to purify the air in your home or office.
Not to mention, they also release oxygen and moisture into the air which is great for the environment and your health!
Can Reduce Dust Particles
Another great benefit of moss walls is that they can help reduce dust particle levels. This is because moss is able to absorb and trap dust particles, making it a great way to keep your garden or patio clean.
So if you suffer from allergies or asthma, then an outdoor moss wall could be a great way to help improve the air quality!
They Are Easy To Maintain
Outdoor moss walls are also easy to take care of and require very little maintenance. All you need to do is mist them with water every few days, and make sure they’re in a shady spot so they don’t dry out.
It may also need a trim every now and then with scissors if the moss starts to grow too long. Apart from that, there’s not much else you need to do except enjoy the view.
Acts As A Natural Insulation
Moss is also a great insulator, which means it can help keep your home cool in the summer and warm in the winter.
This is because moss walls can help regulate the temperature by absorbing heat during the day and releasing it at night. This makes them perfect for homes that get a bit chilly in the evening.
Reduces Carbon Dioxide Levels
Moss walls can also help reduce carbon dioxide levels in the air. This is because moss absorbs carbon dioxide and release oxygen, making it a great way to help purify the air around you.
Not only that, but they also help to regulate humidity levels and can even act as natural insulation for your home.
They Are Aesthetically Pleasing
Last but not least, outdoor moss walls are simply beautiful. They add a touch of nature to any space and can really transform the look of a room.
Whether you choose to go for a small accent wall or a large feature wall, there’s no doubt that outdoor moss walls are a great way to add some extra style and personality to your home.
If you’re looking for a unique and stylish way to decorate your home, then an outdoor moss wall is definitely worth considering. With so many benefits, it’s easy to see why they’re becoming so popular!
How Long Do Outdoor Moss Walls Last?
This all depends on the type of moss you are using, as well as the conditions it’s kept in! If you look after it with proper care, outdoor moss walls can last 2 to 3 years.
Take Note: It’s important to keep in mind that outdoor moss walls are subjected to the weather and can be damaged by strong winds or heavy rains! So proper care is needed for it to last!
Light rain can be a benefit to the moss as it thrives on rainwater but, If you live in an area with harsh weather conditions, it’s important to take precautions to protect your moss wall.
For example, you may want to consider placing it under a covered porch or shed so it’s not directly exposed to the weather. As soon as it’s over, however, you should place the moss wall back in its original spot.
Supplies Your Need
Now that we’ve gone over all the benefits of an outdoor moss wall, you might be wondering how you can create one of your own. Luckily, it’s actually quite simple!
However, there are some supplies you will need and we will explain why you need each one.
- Living Moss
- Soil-Less Garden Wall Kit
- Mix Plants (Optional)
You can build your own moss wall frame but, the soil-less garden wall kit is a much easier option! If you decide to make your own frame, be sure to use rot-resistant lumber such as cedar or redwood.
You will also need some type of wire mesh or chicken wire to attach the moss too. This can be found at most hardware stores.
Take Note: When adding moss to your outdoor moss wall, it’s important that you use living moss and not artificial moss. Artificial moss is used indoors only!
You can find living moss at most garden stores or even online. If you have a hard time finding some, try taking a look in your local woodlands for some moss growing on trees or rocks.
You can also add some other plants to your moss wall if you’d like. This is completely optional but, can add some extra color and texture to your wall.
7 Steps To Make An Outdoor Moss Wall
Now that you have all the supplies, it’s time to get started! Follow these 7 easy steps to create your very own outdoor moss wall.
1. Pick A Location
The first step is to pick a location where you want your moss wall to hang. This will also give you an idea of how wide and long your frame needs to be!
You can be any type of wall including brick, stone, or even wood. Just make sure that the surface is clean and free of debris. If you’re using an existing garden wall kit, then you can skip this step.
2. Create A Frame
If you’re making your own frame, then use rot-resistant lumber to create a rectangular or square frame. The size will depend on the location you chose. Make sure you drill some holes at the bottom of the frame so the water can escape!
Once you’ve made your frame, add some plywood to the back and attach wire mesh or chicken wire to it using staples or nails. Be sure to leave some extra wire at the top so you can easily hang it later on.
If you’re using a “Soil-Less Garden Wall Kit, that we recommended” simply follow the instructions that come with it.
3. Add The Soil-Less Mix
The next step is to add a layer of soil-less mix to the frame. This will help hold the moss in place and keep it healthy. If you’re using an existing garden wall kit, then it will already have one included. Otherwise, you can find the soil-less mix at most garden stores or online.
Be sure to wear gloves when handling the soil-less mix as it can be quite dusty! Once you have your frame filled with the soil-less mix, give it a good pat down so that it’s nice and compacted. Then move on to the next step!
4. Attach The Moss
Now it’s time to start attaching the moss to the frame. You can do this by simply pressing it into the soil-less mix or by using some wire to tie it down.
Moss doesn’t need to be planted in the soil just place it on top, the chicken wire will hold it in place. If your add plants, they will need to plant in the soil!
If you’re using an existing garden wall kit, then the instructions will tell you how to attach the moss. Otherwise, just use your best judgment! Be sure to start from the bottom and work your way up so that the moss is evenly distributed.
5 Add Plants (optional)
As we mentioned before, you can add some other plants to your moss wall if you’d like. This is completely optional but can add some extra color and texture to your wall. Simply press the plants into the soil-less mix alongside the moss and that’s it! Be sure to water them well so that they can take root.
The live plants we recommend using for your moss wall are succulents or plants with short stems. If you really want it to look amazing you can even add wild mushrooms to give it that extra pizzazz!
6. Water The Moss
Now that you’re all done, it’s time to water your new moss wall! This is an important step as it will help the moss and plants take root. It is recommended that you mist it using a spray bottle or hose attachment. Be sure to do this in the morning so that the moss has all day to dry out.
If you notice that the outdoor moss wall is still wet at the end of the day don’t water it again until it’s dry as too much water can cause the moss to rot!
7. Hang It Up
The final step is to hang up your new moss wall! If you made your own frame, then simply use the wire at the top to attach it to the chosen location. If you’re using an existing garden wall kit, then again follow the instructions that come with it.
And that’s it! You now have your very own beautiful Outdoor Moss Wall. Be sure to enjoy it and take care of it so that it can last for many years to come!
Can You Buy An Outdoor Moss Wall Already Made?
If you don’t want to make your own Outdoor Moss Wall, then you’re in luck! You can actually buy them already made. However, places like Amazon.com only sell indoor moss walls.
So if you want a live moss wall, then you’ll have to make it yourself or buy it from a specialty store!
With that said, they do sell all the parts you need to make one including live moss, frames, soil-less mix, and even plants! So it might be worth giving it a try if you’re feeling up to it! and make your own moss wall your be proud of.
Final Thoughts
So know you know how to make an Outdoor Moss Wall in just seven easy steps! This project is perfect for those who want to add some greenery to their outdoor space without all the hassle of traditional gardening.
It’s also a great way to bring some life to an otherwise dull and boring wall. So if you’re looking for something new and exciting to do, then we highly recommend giving it a try!